Last week in our final lesson for this term, we had to get body proportions for a dwarf and an elf.
I was ill during this session so this is why I'm uploading this now.
We were told that a Dwarf was about four heads high and an Elf was nine and a half heads high.
Considering I wasn't in the lesson, I do think I got the proportions right. However if I did have a bit more time I would have added a bit more detail to the characters.
This is my assessment for my 3D visual design lessons. Our task was to create a temple as accurately as we could. We only had to model and texture the temple though and not the surrounding area.
Here is the reference image that I had to follow along with the two texture files that we were provided with.
Ref Image
Roof texture
Brick texture
So I started modeling the temple during our lesson and I got to the following stage. I wasn't very happy with what I had got so I decided to start again.
Scrapped version
Here are a few of my work in progress shots, I found this task rather hard considering most of the other things we have had to model, we did with a tutorial or had a helping hand along the way. Looking back though, I do think I learnt rather a lot during the process.
Front pillar ready to be duplicated
Front pillar textured
Once I had a pillar I duplicated it to get a scale of the overall building. By doing it this way I knew I had a better method to my previous attempt.
Duplicated pillars for scale
I got carried away and forgot to take a few in progress screenshots between the pillars and pretty much the final temple.
Final Temple - Front
Final Temple - Side angle
It was now time to texture the Temple, I quickly applied the textures to the different models to see what it would look like.
Quickly textured...
I then used the PSD Network to neaten up the textures and get them in the right place and finished up with the following final piece.
I'm happy with the progress I have made when I think that we only started using Maya towards the end of September.
Here is my latest update on the game I have been working on for my Game Encounters assessment. This is hopefully my finished product and ready to submit. Its come a long way since my first post, particularly in the design aspect. Here is a quick video play through of my game:
In my first image you can see where the player spawns, this is at the back of the garden. My opinion is that the garden is the best visual looking thing in my level. I put quite a lot of time into the detail and I don't think it's a bad effort for my first game.
The finished Garden
This is my first trigger in the game, as the player approaches the ladder they enter an invisible box that causes the ladder to fall towards the window.
When the ladder collides with the window this activates my second trigger of the glass smashing and it also activates a sound of smashing glass. The smashed glass also has gravity applied to it, therefore falling out of the window. I am over the moon with how this turned out and i really think I did a good job of it.
The Ladder animation with the Glass Smashing
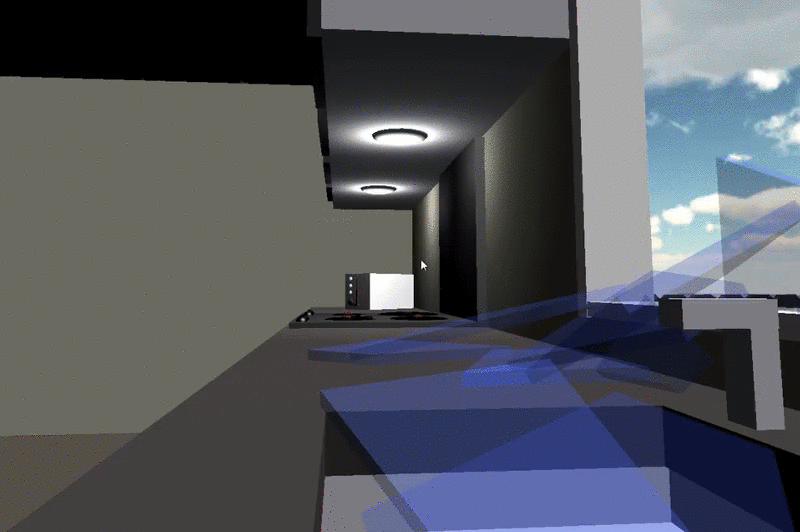
In this picture I'm showing the worktops where a few of my other triggers occur.
Kitchen worktops
Once you have come through the smashed window I also added a small trigger that allows you to click and hold on the tap to fill the sink with water. I wanted this to be sort of like an Easter egg.
Sink filling up
This is the match that the player has to click on to pick up and take to the fire to be able to light it.
Match on the worktops
Here I am showing the animation of the match and then showing that it disappears when click on. I also made the trigger box on the match a lot taller than the actual match just so its a bit easier to pick up.
Match animation, then getting picked up
This is just a simple picture of my big bulky toaster before the toast drops in.
The toaster
This is my favourite bit of my game. This is another trigger that launches the toast out of the toaster when you click the big black button. I think the way the toast comes out of the toaster is epic!
Toaster in action!
Here is a nice view of the living room and kitchen.
Living room / Kitchen
Last but not least, my final trigger. Once the player has collected the match and is within reach of the fireplace you can click on the logs to light a big toasty fire.
The final trigger, FIRE!
Here is the bedroom, this is where I was going to place the match for the player to pick up. But one of the requirements for this assessment was for the level to be under three minutes and I didn't want to risk putting the match so far away.
The bedroom
I have learned rather a lot in the last few months doing this project. I now understand some of the basic functions and triggers for unity using C#. I am already thinking of all the other ideas that I can make in the future. This project also gave me the time to learn how to create my own personal models in Maya. I can't wait until we get a project where we can texture our levels properly! :-)
This weeks homework was to get a basic understanding of the anatomy from the inside out. So our first task was to study and then sketch out the main areas of the skeleton.
In the top half of the image you can see that I sketched out the 'hinge' joint that connects the knee together, the 'ball and socket' joint for your average hip, a 'saddle' and 'gliding' joint for your wrist and knuckles, and lastly a skull.
Top: Sketches of main areas. Bottom: Front, Side & Back of Skeleton.
In the bottom half of the image I drew out the skeleton from the Front, Back & Side. I used guide lines so that pretty much everything was In the same place for each side.
I scanned everything In and added the names of the main bones after.
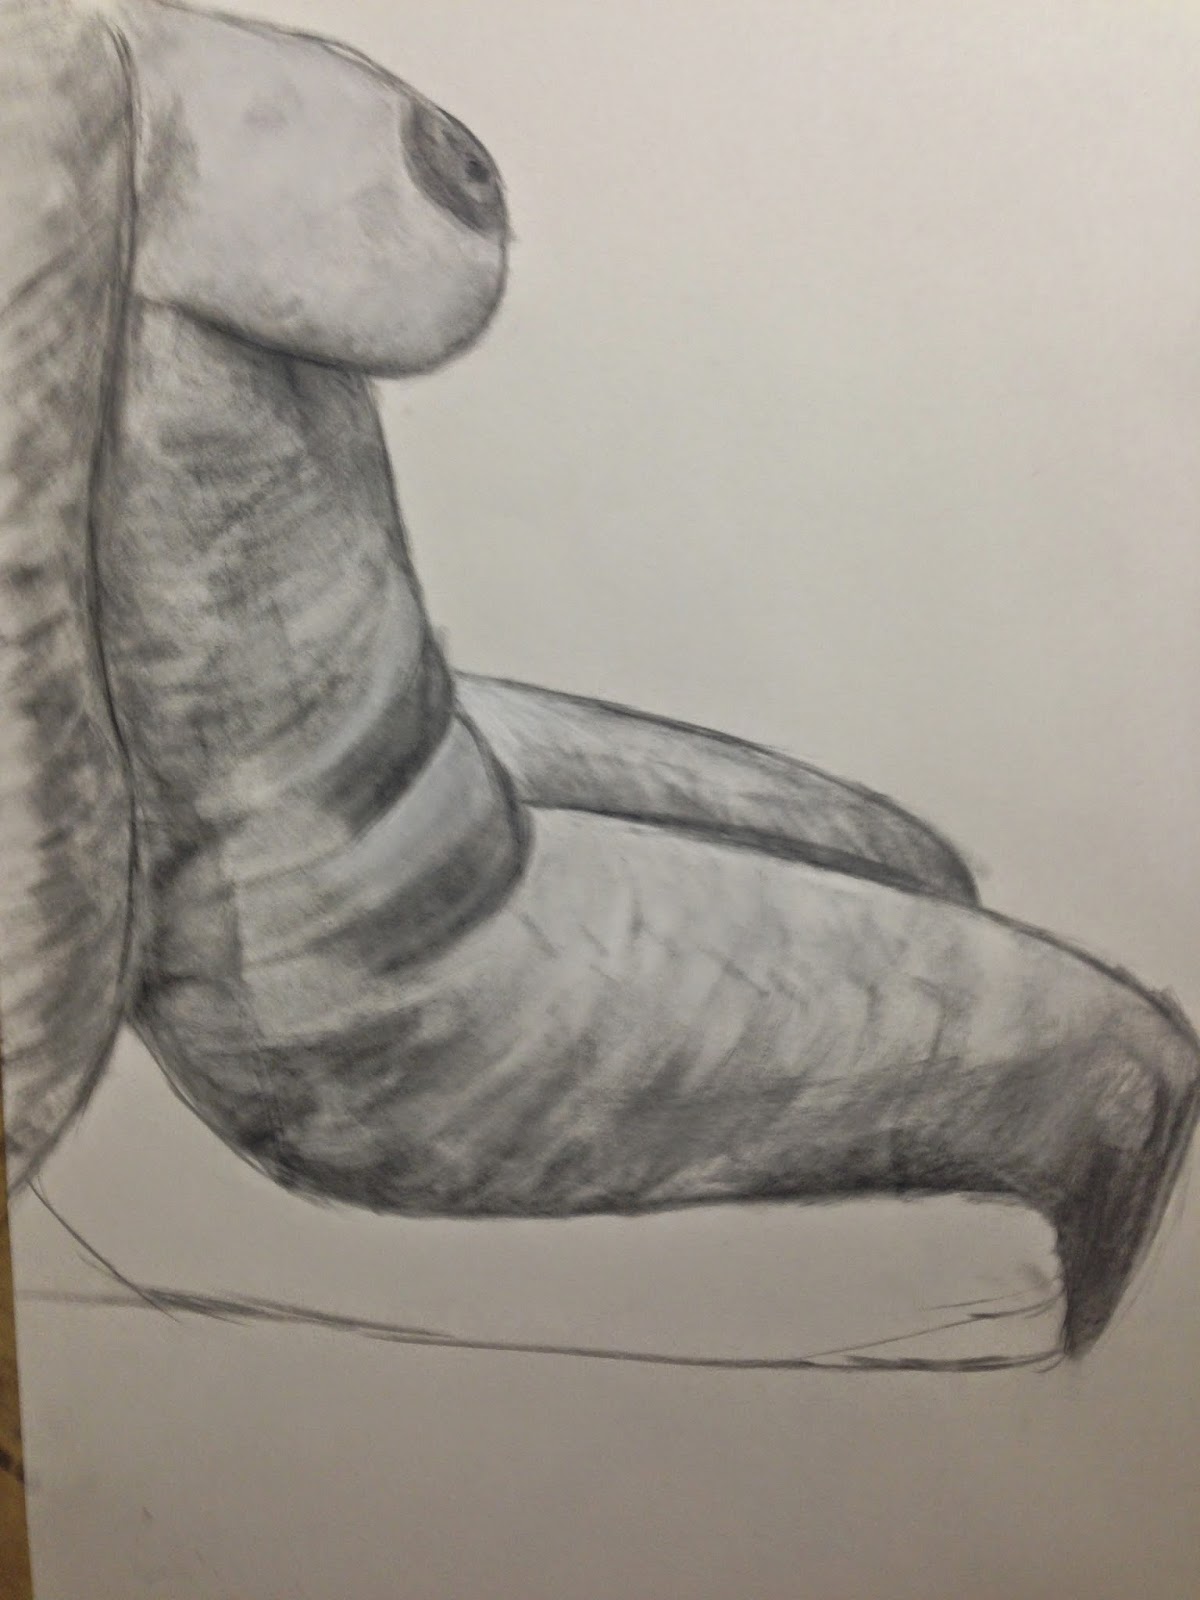
This is my first post on my life drawing (I know, that's really bad).
This is just a few of my favourite pieces so far. I really like adding depth with the charcoal and my drawings could also get a lot better, but that's what the lessons are for right?
For this weeks homework we had the task of rigging a fish based on the one we modeled in our first bit of Maya homework and then animating a swimming motion. In the tutorial we were supplied with a model of the fish hence the different texture from mine. We had to create the joints and then edited the skin mesh so that only the parts we wanted to move actually moved (without this other parts of the body were getting dragged along with it and it looked unnatural).
I believe I learnt a few more valuable tools with this homework and I now know how to apply it to my own personal models.
This weeks homework task was design an armored vehicle, I'm quite a big fan of tanks so I thoroughly enjoyed this task.
I set about making a mood board bearing in mind that my final piece had to be in two point perspective and I also had to use the lighting technique that we learnt in our previous session. I put together the following images.
Mood board
Here are my sketches for my tanks, I started off with a few simple ones and tried to re-do them with a bit more detail. I usually do this step in my sketchbook, but I decided that I needed to practice doing rough sketches on the computer with my tablet. I liked the idea of the bottom right tank because It is much like a World War 1 tank and this is something I took great interest in at school.
Sketches
After picking the tank I wanted to follow up on I quickly set out some perspective lines and set them to an opacity of 10% so that I could see what I was doing, whilst also keeping the perspective. I was happy with my design and was looking forward to adding the shading/lighting to it as I knew this was going to be a good challenge to me because I went for a more rounded tank with wheels rather than a more blocky shape.
Lineart & Perspective lines
I added one whole back layer of a 50% grey and then worked in the darker and lighter areas of the tank. Overall I am really happy with my end result and I think the line art looks great with the different shades of lighting. I left the perspective lines on as required and also added a basic shadow.
Final Design
I was tempted to see what It would look like with a colour over the top so I grabbed a medium pink and changed the layer to colour burn. I feel this really shows off the different shades on the curve of the wheel and the turret. I've also never seen a pink tank... so there you go!
In today's session we had to animate our turrets within Maya. The process was rather simple, although this animation is only a few seconds long, I can imagine a more complex animation being a lot more difficult.
In my opinion I am understanding the 3D side of the course better than the 2D visual design. So as usual I am looking forward to the next session.
In this task we had two weeks to design our own insectoid. My general idea was to aim for a praying mantis, but with wings and blades for hands.
So I got to work on my mood board and researched insectoids as I'd never really hear of them before.
Mood board
I then sketched out the few parts that I wanted my insectoid to have. I was going to have him holding a blunt axe but I ended up going for blade hands as I thought this was cooler.
Sketches
I jumped straight in and got to work with the blueprints of my guy, I am generally happy with how he turned out and I think i got the proportions right for each side. I used Photoshop's rulers to help me see this.
Blueprints - 'Front' & 'Side'
After finishing my blueprints I started on my three quarter view, to be honest I really struggled with this piece and I know this is an area that I will need to improve on in the near future. I liked the design of my insect but there is definitely room for improvement.
Final Insectoid
My insectoid is a Praying Mantis... called 'Prantis', but in a former life he was a human. The only thing that has been carried over from that life was his brain and his leg muscles. Prantis spends his days guarding the Temple of Pretentious Mantis'. He is far superior to his Mantis friends because they are still merely sticks.
The week before last we were given the task to model and texture an old American gas pump using Maya to model and Photoshop to texture.
The process took a while as this was the first bit of work we have done from start to finish on our own.
I learnt a lot more about the various tools in Maya including the 'PSD Network' and the 'point light'.
Overall I am happy with my final result and the tutorial from Lynda.com gave me a great insight on how to get a great looking rust texture whilst also updating the bump and specular maps to give it a nice looking 3D effect.
My homework this week was to create a one point perspective following a YouTube video that we were provided with. Because I had never done perspective work before I also followed the beginner tutorial and created the room perspective.
I enjoyed this task, but I do believe my beginner task turned out better. I tried to use water colours on my final piece and quite frankly... I think I suck at them haha. This task gave me the basic understanding on perspective work.
This homework task will help me out for later bit of work that require more points of perspective.
I have been working on my first game 'Minni Maan'. In my last post about this game I showed my one sheet and a very simple model of the house that I made in Maya that I was going to be using.
Since then I have made a few more models, added a simple animation that will be used for my first triggered event and also a simple script to hide a plane so that the player doesn't fall through the ladders gaps.
Here is the storyboard for my game.
Storyboard
Here are the images of my updates and an animated gif of my animation.
In today's session we were given the task to bake a texture map onto the turret model that we had been working on. We used a program called 'xNormal' to generate the normal and ambient occlusion maps.
I then took the generated maps into Photoshop and worked on it there. This is my favourite piece of work so far as I create bespoke textures for each layer of detail as I thought this would look better than just pasting one texture over the whole thing. I really like the end result and look forward to the next session!